Introducing Svelte by Example
This week, I released Svelte by Example, a tutorial/resource/whatever-you- want-to-call-it introduction to Svelte.
The goal of Svelte by Example is not to turn you into an expert Svelte consultant after reading it through, but to introduce you to the framework’s main concepts, and hopefully peak your curiosity and have you dig deeper.
If you’ve been curious about Svelte but haven’t had time to give it a look yet, it’s for you!
Keep reading if you want to learn more about how the site is built.
Implementation details
Svelte by Example is built with SvelteKit. (Otherwise it would be awkward, right?) It only has a homepage and example page template, so the codebase isn’t that large. You can browse the source code (and fix my typos) on GitHub.
The fun part was figuring out a way to author content and add display metadata. Each example is laid out in two columns: a description on the left side, and a code snippet on the right. I wanted to be able to place the description at the same height as the snippet.
Here’s part of the content’s source for that page:
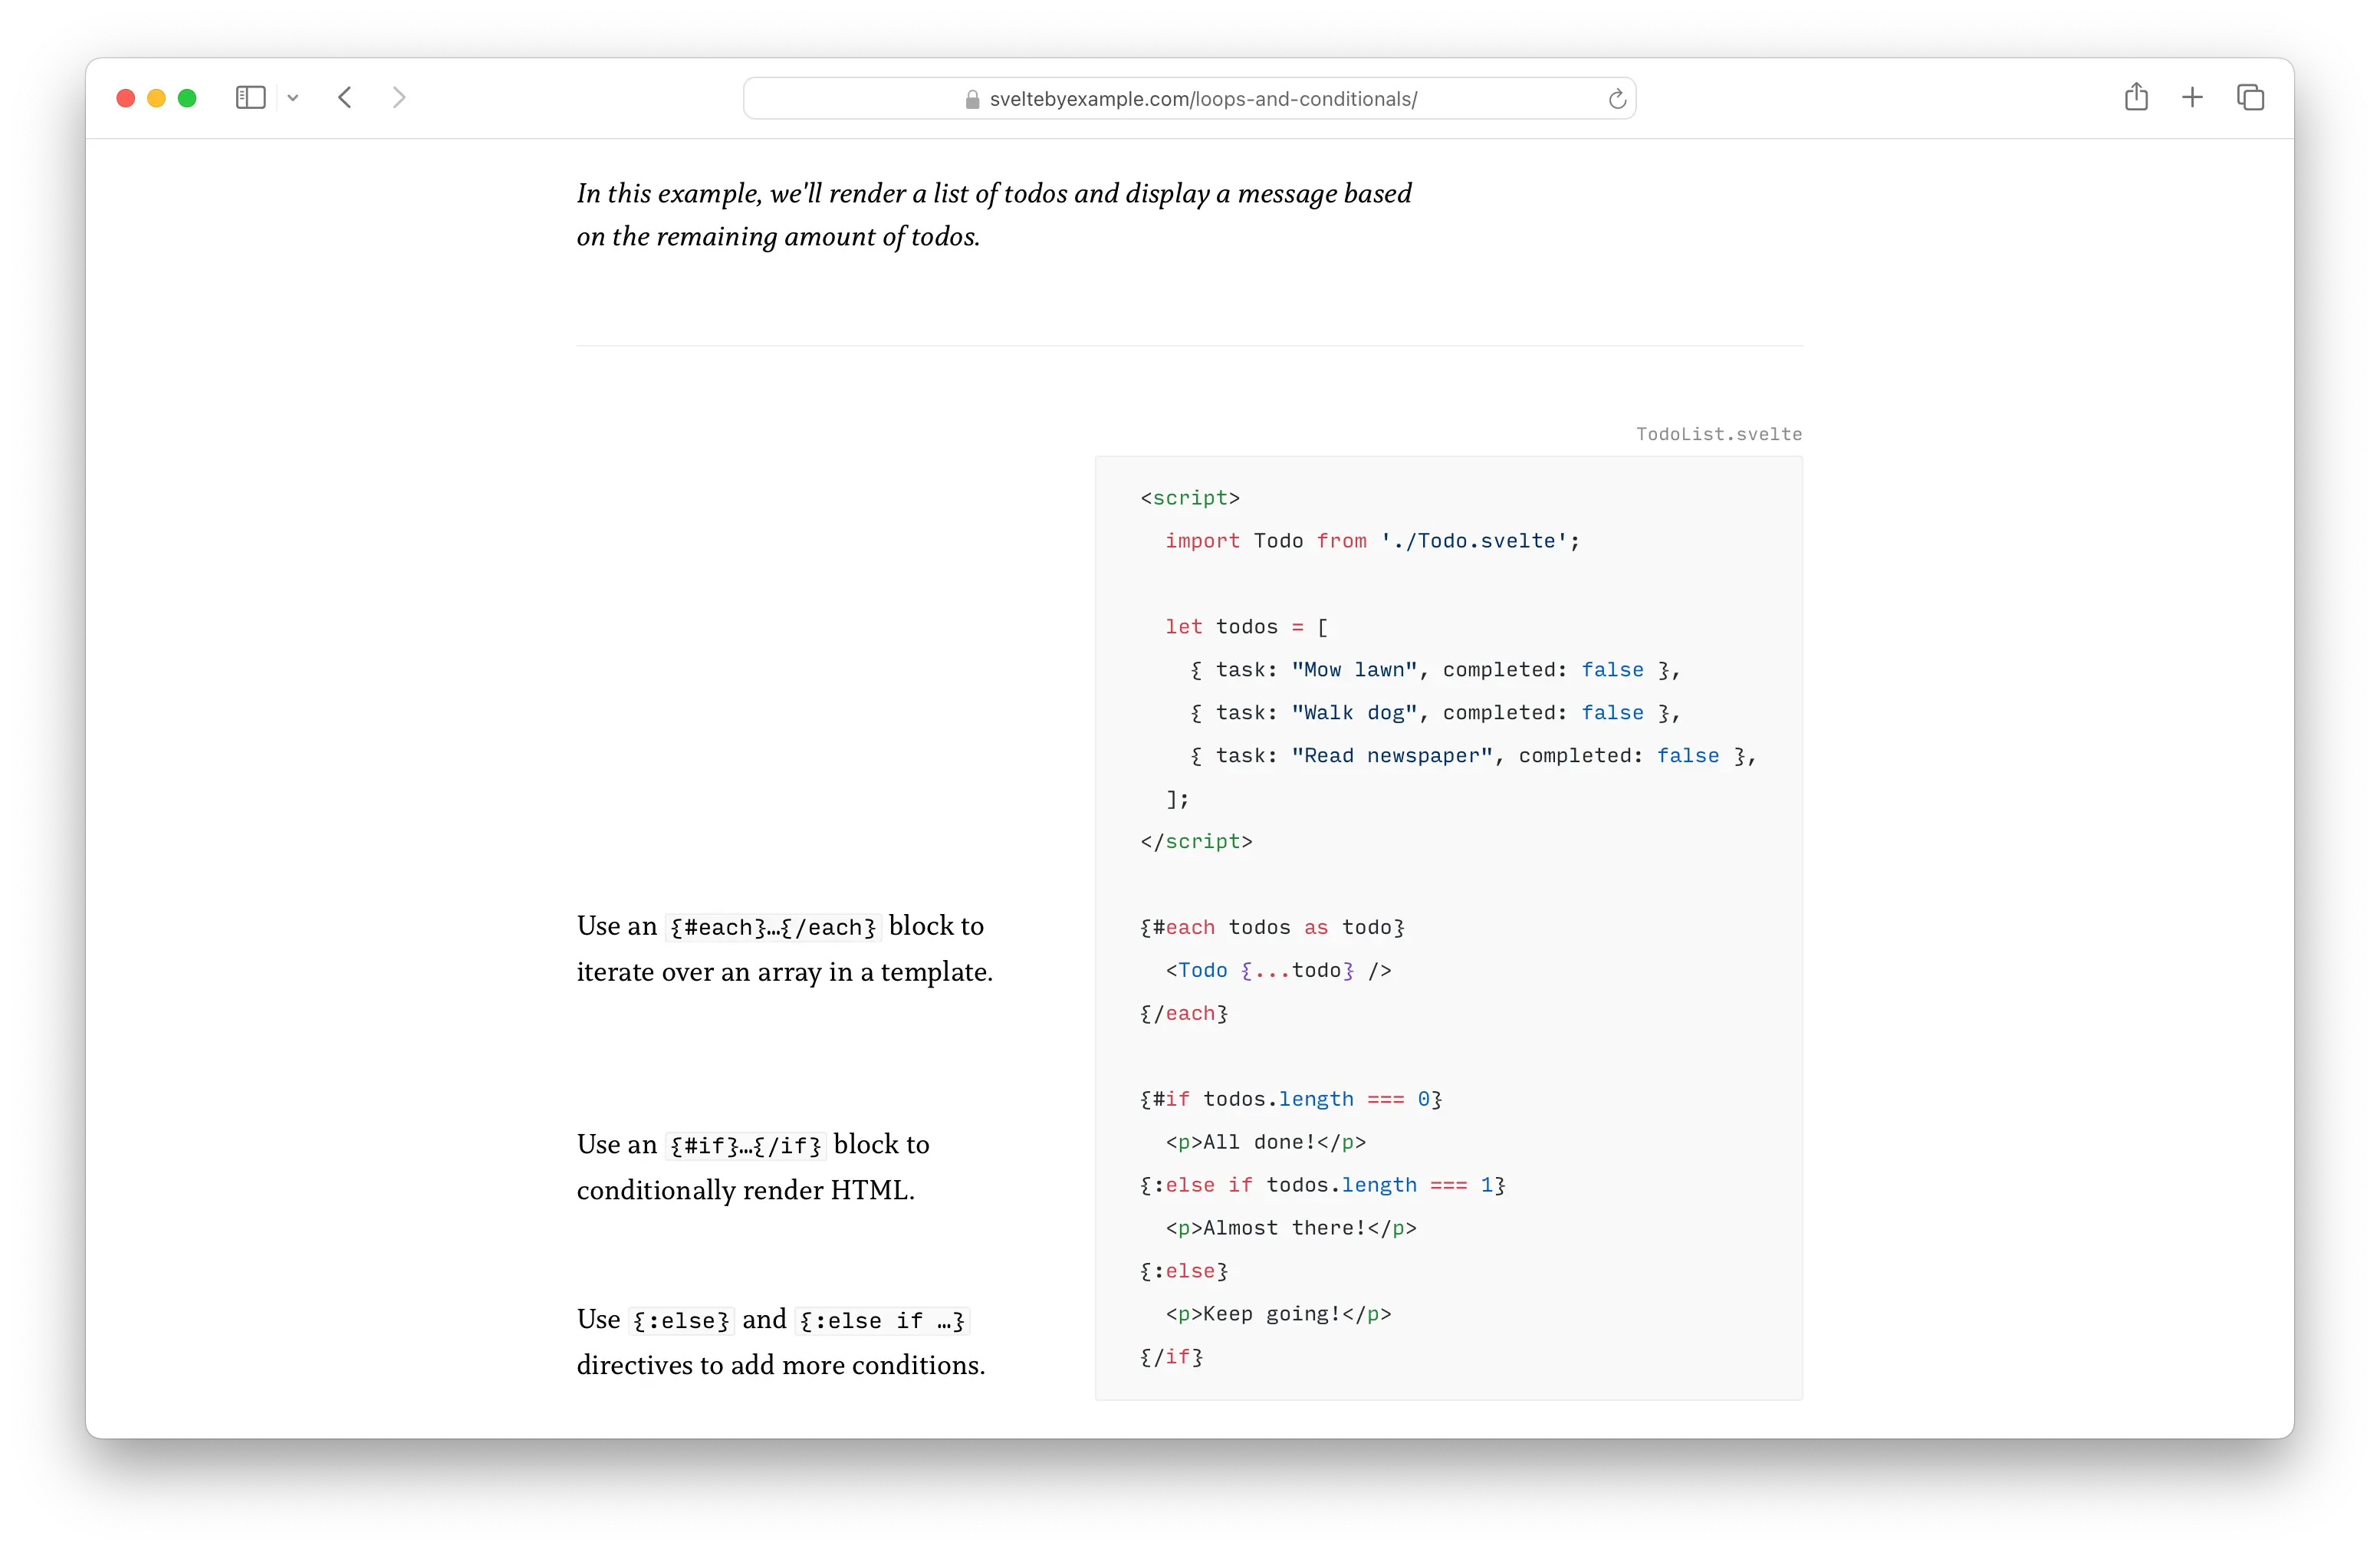
Svelte uses `{#each}` and `{#if}` template directives to render lists and conditionally render content.

*In this example, we'll render a list of todos and display a message based on the remaining amount of todos.*

---

{12} Use an `{#each}…{/each}` block to iterate over an array in a template.

{16} Use an `{#if}…{/if}` block to conditionally render HTML.

{20} Use `{:else}` and `{:else if …}` directives to add more conditions.

```svelte
<!-- TodoList.svelte -->
<script>
  import Todo from './Todo.svelte';

  let todos = [
    { task: "Mow lawn", completed: false },
    { task: "Walk dog", completed: false },
    { task: "Read newspaper", completed: false },
  ];
</script>

{#each todos as todo}
  <Todo {...todo} />
{/each}

{#if todos.length === 0}
  <p>All done!</p>
{:else if todos.length === 1}
  <p>Almost there!</p>
{:else}
  <p>Keep going!</p>
{/if}
```
The content is set with a superset of Markdown. First, I generate HTML from Markdown, then use Cheerio (a jQuery alternative that runs in Node.js) to extract & transform content to data objects I can use to render in SvelteKit.
- With Cheerio, I split the page in blocks. Each “block” on the page is separated by a horizontal rule
---. - I extract the code from the blocks so I can render the description and code in different columns. Code is also passed through Shiki for syntax highlighting.
- Some paragraphs in the descriptions are prefixed with a number in curly braces, like
{5}. I extract those numbers and add them as metadata, so I can absolutely position the line when rendering. This gives me exact control of the description placement.
All this happens in a build-content.js script (source), which transforms all markdown files and writes them in a large JSON file, which I can read in SvelteKit. During development, I used Chokidar to add a file watcher so content changes trigger the build script, which triggers a change in SvelteKit and hot reloads in the browser.
I had a lot of fun building the project as it was a healthy mix of content, design, and development. Time for a break now that it’s out, but I have more than enough ideas to expand on in the future.